# 免费微软云服务器搭建一个免翻墙的chatgpt站点(不能用了)
# 前提条件
- 注册微软帐号(直接在官网注册)
- 微软云服务器的美国节点云服务器
- 域名,最好是 com后缀的
- chatgpt账号
- chatgpt的API
上两篇文章我们已经有了,微软云的美国服务器和域名,本篇文章教大家免费微软云服务器搭建一个免翻墙的chatgpt站点。
# 获取OpenAI API 密钥
OpenAi Keys 申请:https://beta.openai.com/account/api-keys
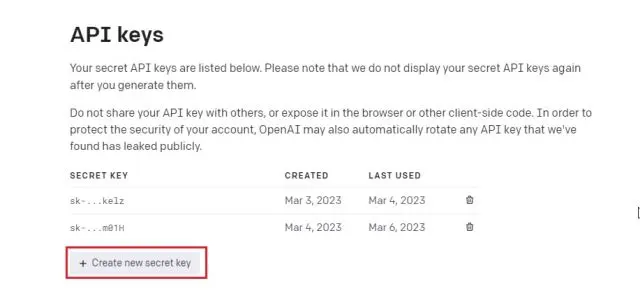
在这里,单击“创建新密钥”并复制 API 密钥。请注意,您以后无法复制或查看整个 API 密钥。因此强烈建议立即将 API 密钥复制并粘贴到记事本文件中。
另外,不要公开分享或展示 API 密钥。这是一个私钥,仅用于访问您的帐户。您还可以删除 API 密钥并创建多个私钥(最多五个)。
5美元 ,有效期:3个月
# 远程连接云服务器
# 安装docker
#CentOS 7、Debian、Ubuntu

$ sudo su root
# curl -sSL https://get.docker.com/ | sh

# systemctl start docker
# systemctl enable docker.service
2
3
4
5
6
7
# 启动docker
开源项目:https://github.com/Chanzhaoyu/chatgpt-web
开源代理:https://github.com/geekr-dev/openai-proxy
# chatgpt-web
# 使用OpenAI API KEY
已经无法使用
ChatGPT error 429: {"detail":"It is recommended to upgrade to the latest PandoraNext: https://github.com/pandora-next/deploy"}
这里要将OPENAI_API_KEY换成你的。
# docker run -itd --name chatgpt-web \
--restart always \
-p 3002:3002 \
--env OPENAI_API_KEY=<chatgpt-api-key> \
chenzhaoyu94/chatgpt-web
2
3
4
5
# 使用 OpenAI的 OPENAI_ACCESS_TOKEN(免费)
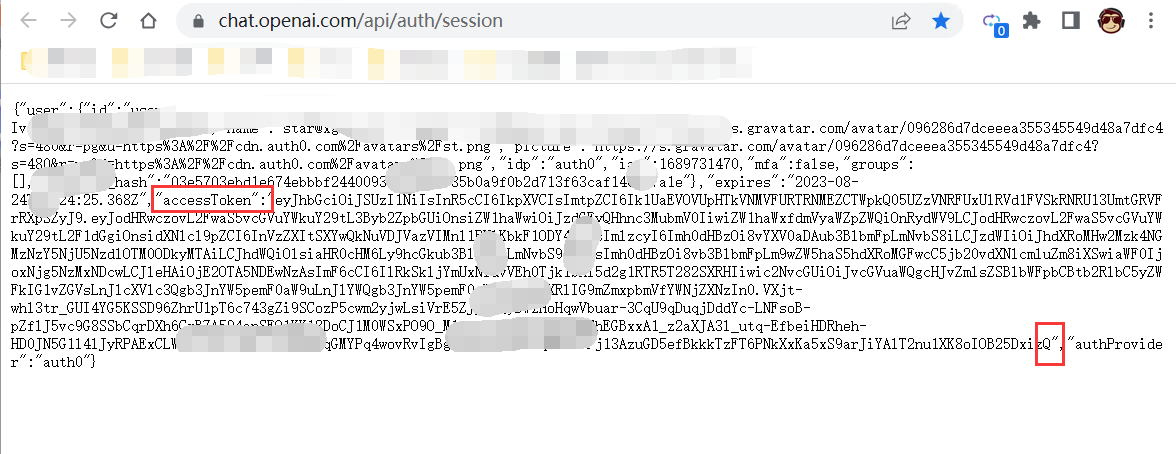
浏览器访问: https://chat.openai.com/api/auth/session
如图复制 "accessToken":"这里是你的accessToken" ,后面的引号内的所有字符。
会有过期时间,通常是1个月,一个月之后要更换accessToken。
docker run -itd --name chatgpt-web \
--restart always \
-p 3002:3002 \
--env OPENAI_ACCESS_TOKEN='替换成你的accessToken'  chenzhaoyu94/chatgpt-web
2
3
4
# 配置nginx
配置nginx
# vim /etc/nginx/conf.d/chat.chuanqu.ltd.conf
按键盘的 'a' 将下面的配置填写
server {
        listen       80;
        server_name  chat.chuanqu.ltd;
        #root /path/;
        access_log /dev/null;
        error_log /dev/null;

        location / {
                #配置nginx密码
				#auth_basic "Please input password"; #这里是验证时的提示信息
                #auth_basic_user_file /etc/nginx/conf.d/htpasswd; # 密码的路径

                index index.php index.html;
                proxy_pass      http://127.0.0.1:3002;
                proxy_redirect off;
                proxy_set_header Host $host;
                proxy_set_header X-Real-IP $remote_addr;
                proxy_set_header X-Forwarded-For $proxy_add_x_forwarded_for;

        }
}

按键盘的 ':wq' 保存退出

查看配置是否正确:
# nginx -t

重启nginx服务:
# systemctl restart nginx
2
3
4
5
6
7
8
9
10
11
12
13
14
15
16
17
18
19
20
21
22
23
24
25
26
27
28
29
30
31
32
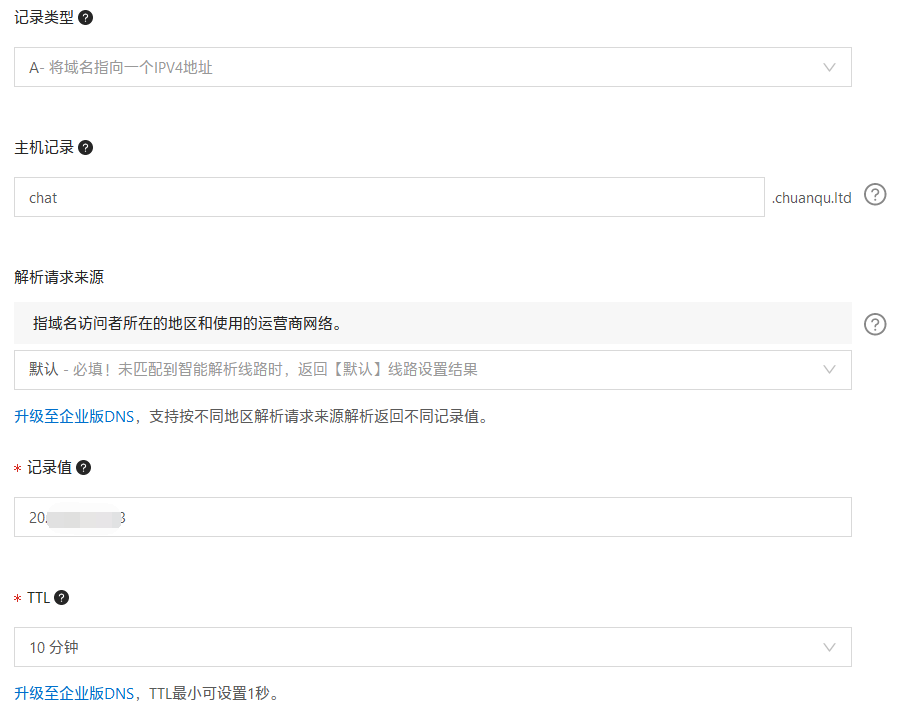
# 域名解析
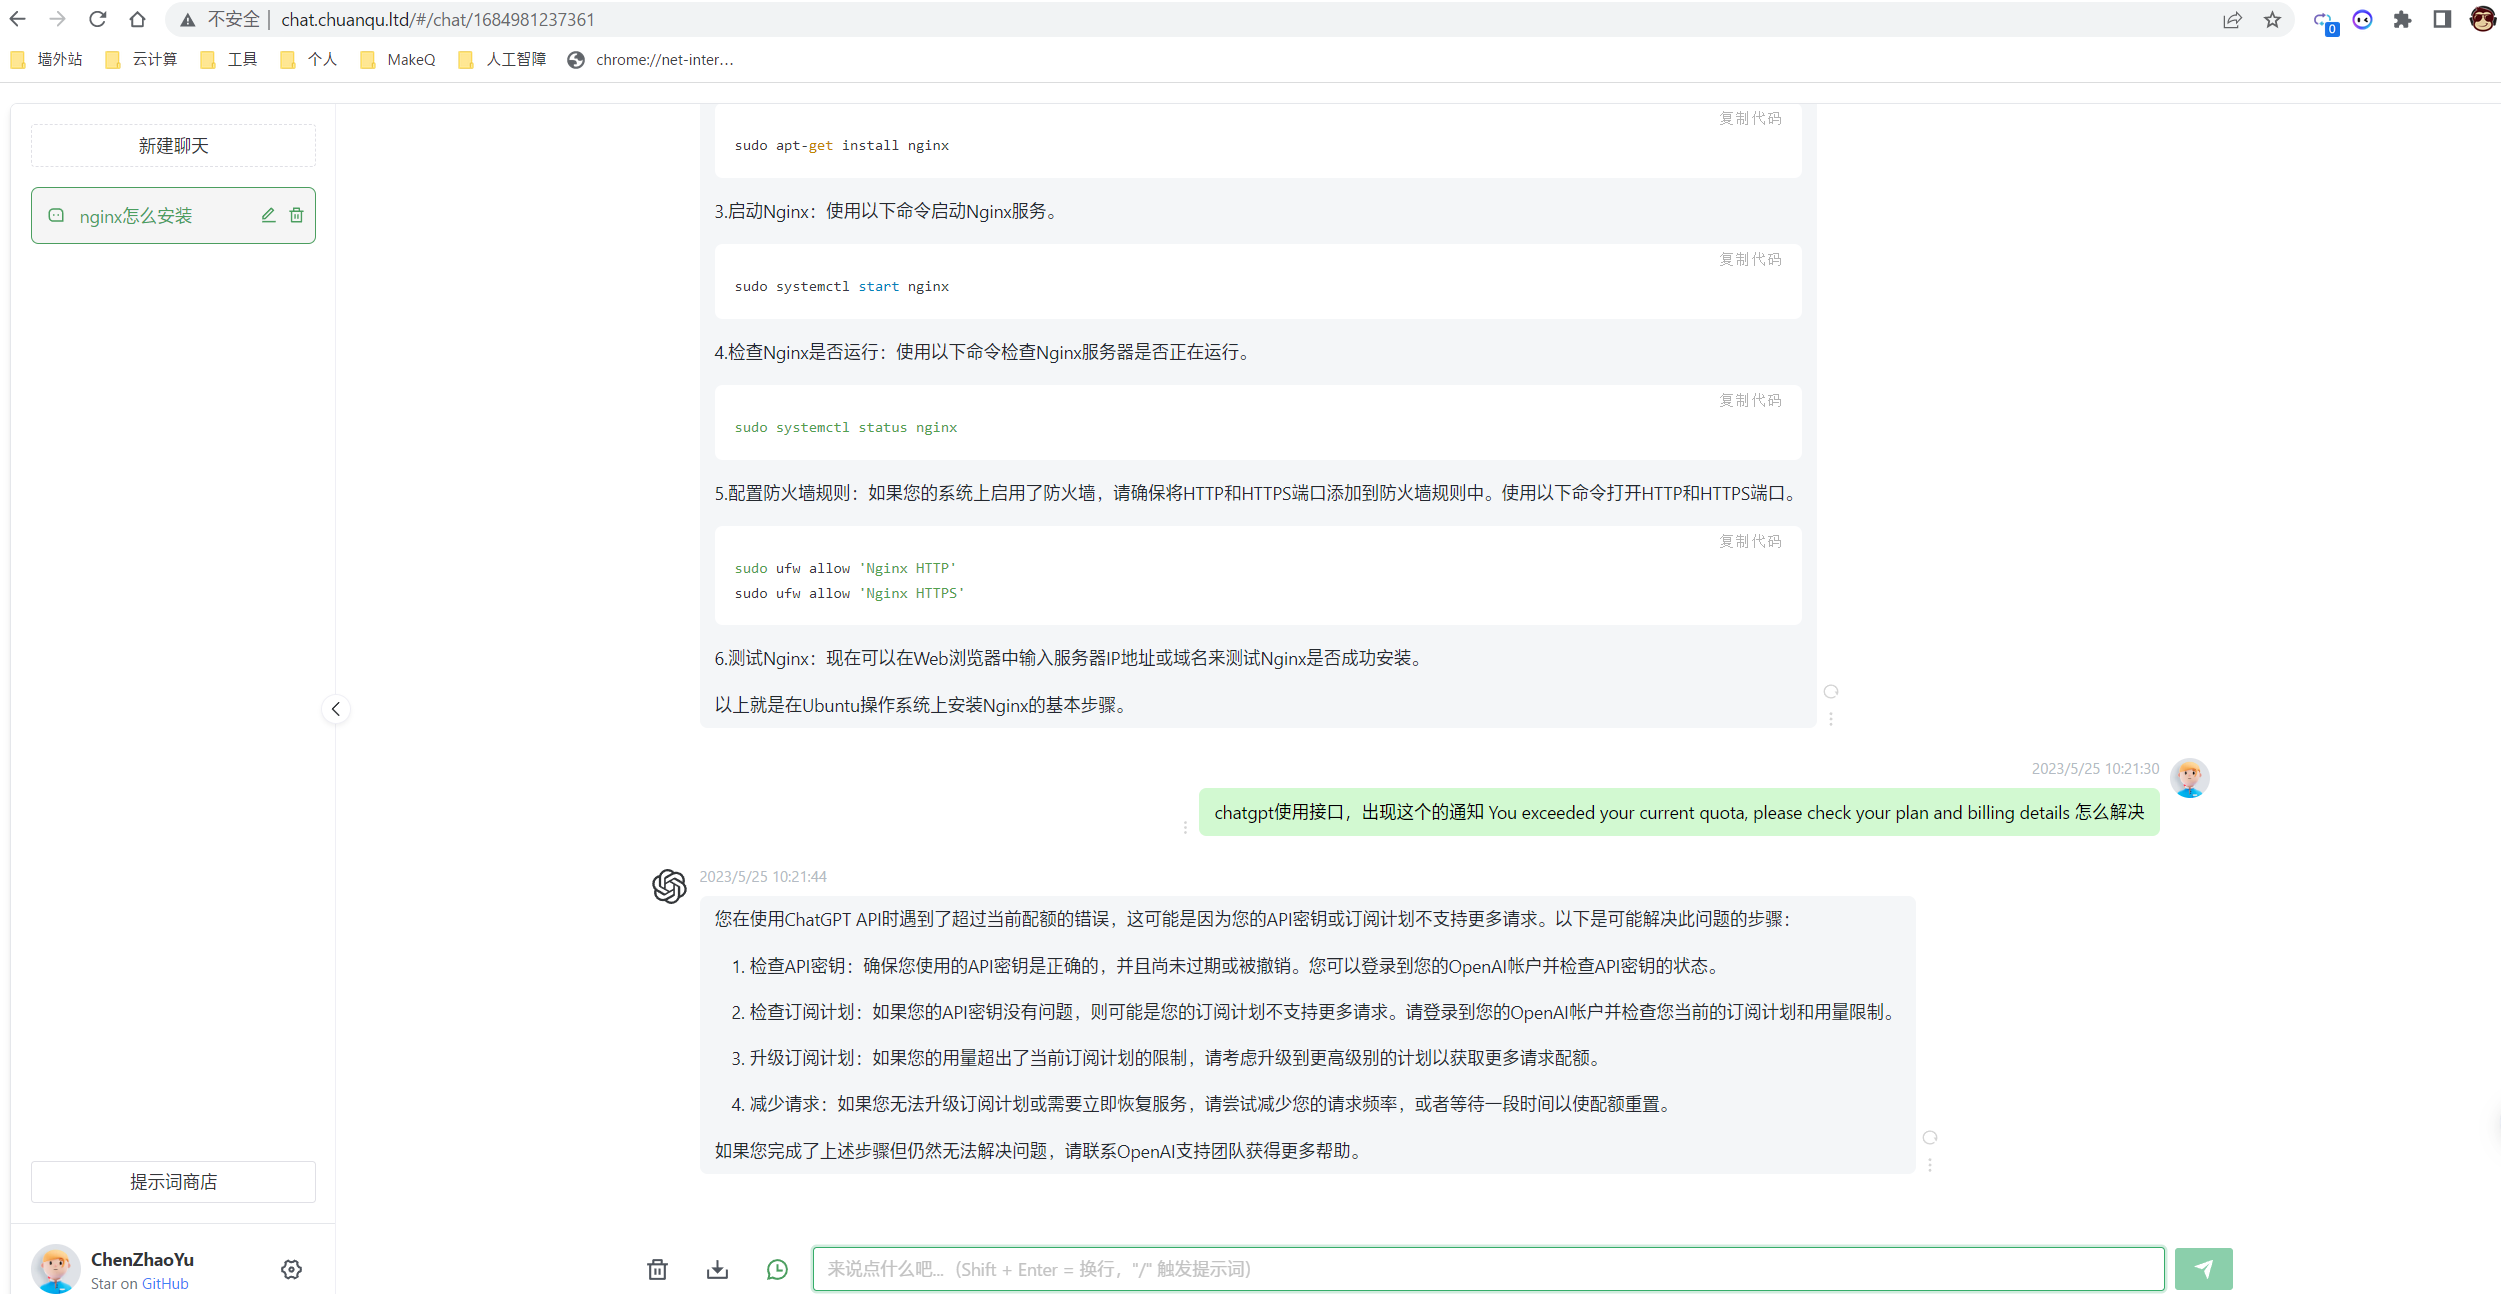
# 访问
# ubuntu 配置nginx验证密码(非必须)
如果没有验证,任何人只要知道你的地址就可以使用
# apt-get install apache2-utils

# htpasswd -c /etc/nginx/conf.d/htpasswd admin
New password:   (输入你的密码)
Re-type new password: (重复输入你的密码)
Adding password for user admin
# cat /etc/nginx/conf.d/htpasswd

#在nginx配置下新增下面两行
auth_basic "Please input password"; #这里是验证时的提示信息
auth_basic_user_file /etc/nginx/conf.d/htpasswd; # 密码的路径


# nginx -t
# systemctl restart nginx
2
3
4
5
6
7
8
9
10
11
12
13
14
15
再次访问则需要输入密码
# 更新密钥
# 更新 OPENAI_ACCESS_TOKEN
# docker rm -f chatgpt-web

# OPENAI_ACCESS_TOKEN='网页获取获取到的KEY' # https://chat.openai.com/api/auth/session

# docker run -itd --name chatgpt-web --restart always -p 3002:3002 --env OPENAI_ACCESS_TOKEN="${OPENAI_ACCESS_TOKEN}"  chenzhaoyu94/chatgpt-web
2
3
4
5
chatgpt的accessToken有效期是多久? 30天
# 更新OPENAI_API_KEY
# docker rm -f chatgpt-web

https://platform.openai.com/account/api-keys ,上面页面获得的 OPENAI_API_KEY

# OPENAI_API_KEY="获得的密钥"

# docker run -itd --name chatgpt-web --restart always -p 3002:3002 --env OPENAI_API_KEY="${OPENAI_API_KEY}" chenzhaoyu94/chatgpt-web
2
3
4
5
6
7
8
9
# 2023-11-22更新

ChatGPT error 429: {"detail":"It is recommended to upgrade to the latest PandoraNext: https://github.com/pandora-next/deploy"}
# 获取 JWT Token
将获取到的JWT Token内容写进同目录的license.jwt (opens new window)文件中。
https://github.com/pandora-next/deploy#%E5%85%B3%E4%BA%8E-licensejwt%E6%96%87%E4%BB%B6

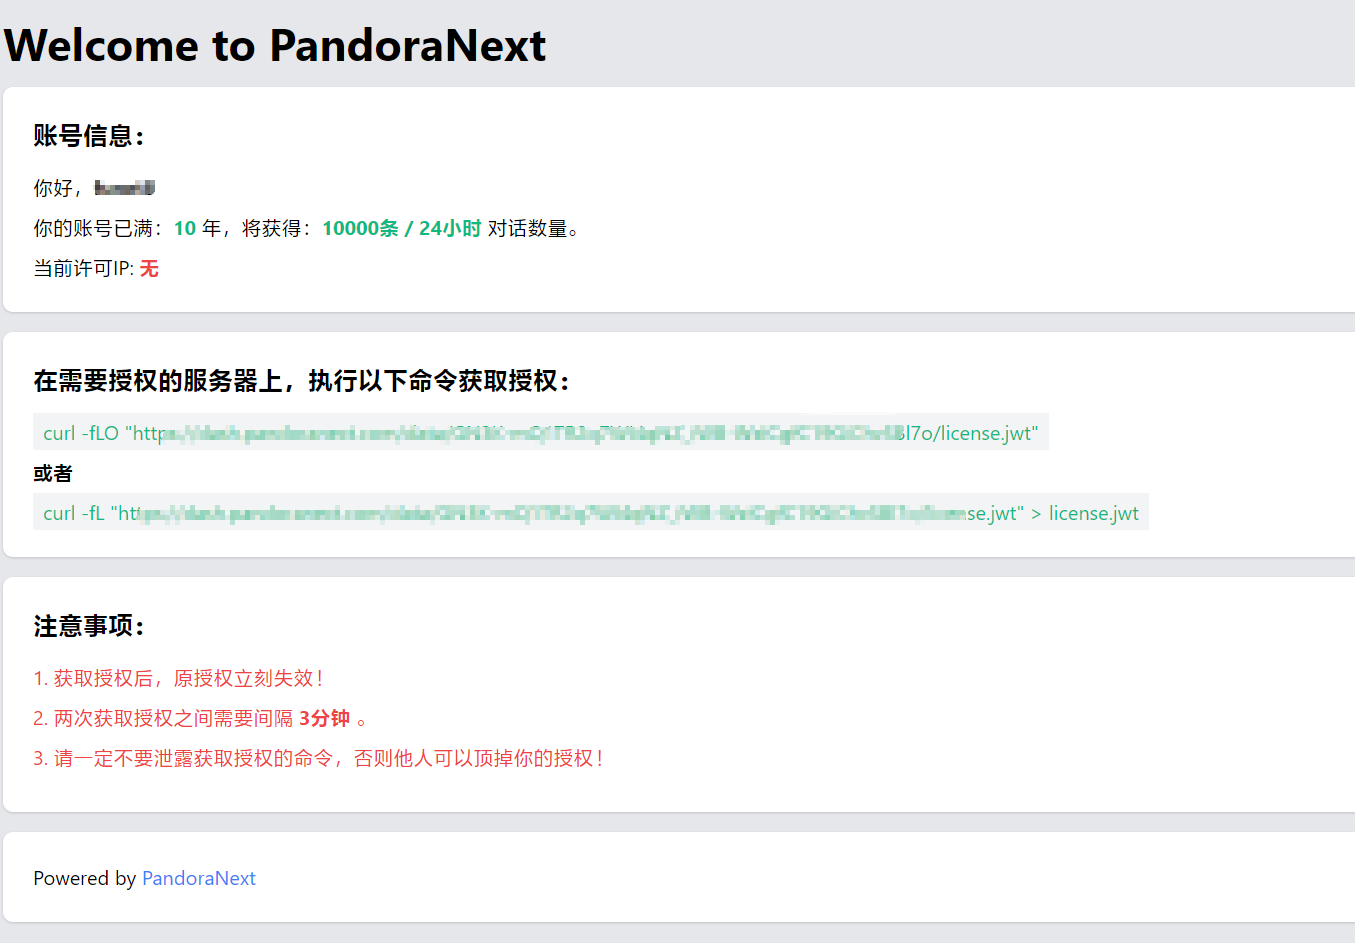
在需要授权的服务器上,执行以下命令获取授权:
# curl -fLO "https://dash.pandoranext.com/data/XXXXX/license.jwt"
# cat license.jwt
2
3

# 执行docker
$ docker pull pengzhile/pandora-next
$ PANDORA_NEXT_LICENSE=`cat license.jwt`
$ echo $PANDORA_NEXT_LICENSE
$ docker run -d --restart always --name PandoraNext --net=bridge -p 8181:8181 \
             -e PANDORA_NEXT_LICENSE="$PANDORA_NEXT_LICENSE" pengzhile/pandora-next


容器内默认监听8181端口,映射宿主机的8181端口,可自行修改。
你可以映射目录到容器内的/data目录,config.json、tokens.json和license.jwt放在其中。
自行使用真实的JWT Token替换命令中的<JWT Token>,没有<和>,不要搞错。

$ docker ps
CONTAINER ID   IMAGE                      COMMAND                  CREATED         STATUS         PORTS                                       NAMES
d72ef7e4986d   pengzhile/pandora-next     "/opt/app/entrypoint…"   5 seconds ago   Up 2 seconds   0.0.0.0:8181->8181/tcp, :::8181->8181/tcp   PandoraNext
2
3
4
5
6
7
8
9
10
11
12
13
14
# 配置nginx
server {
        listen       80;
        server_name  chat.xgss.net;
        #root /path/;
        access_log /dev/null;
        error_log /dev/null;

        location / {
                #配置nginx密码
                auth_basic "Please input password"; #这里是验证时的提示信息
                auth_basic_user_file /etc/nginx/conf.d/htpasswd; # 密码的路径

                index index.php index.html;
                proxy_pass      http://127.0.0.1:8181;
                proxy_redirect off;
                proxy_set_header Host $host;
                proxy_set_header X-Real-IP $remote_addr;
                proxy_set_header X-Forwarded-For $proxy_add_x_forwarded_for;

        }
}
2
3
4
5
6
7
8
9
10
11
12
13
14
15
16
17
18
19
20
21
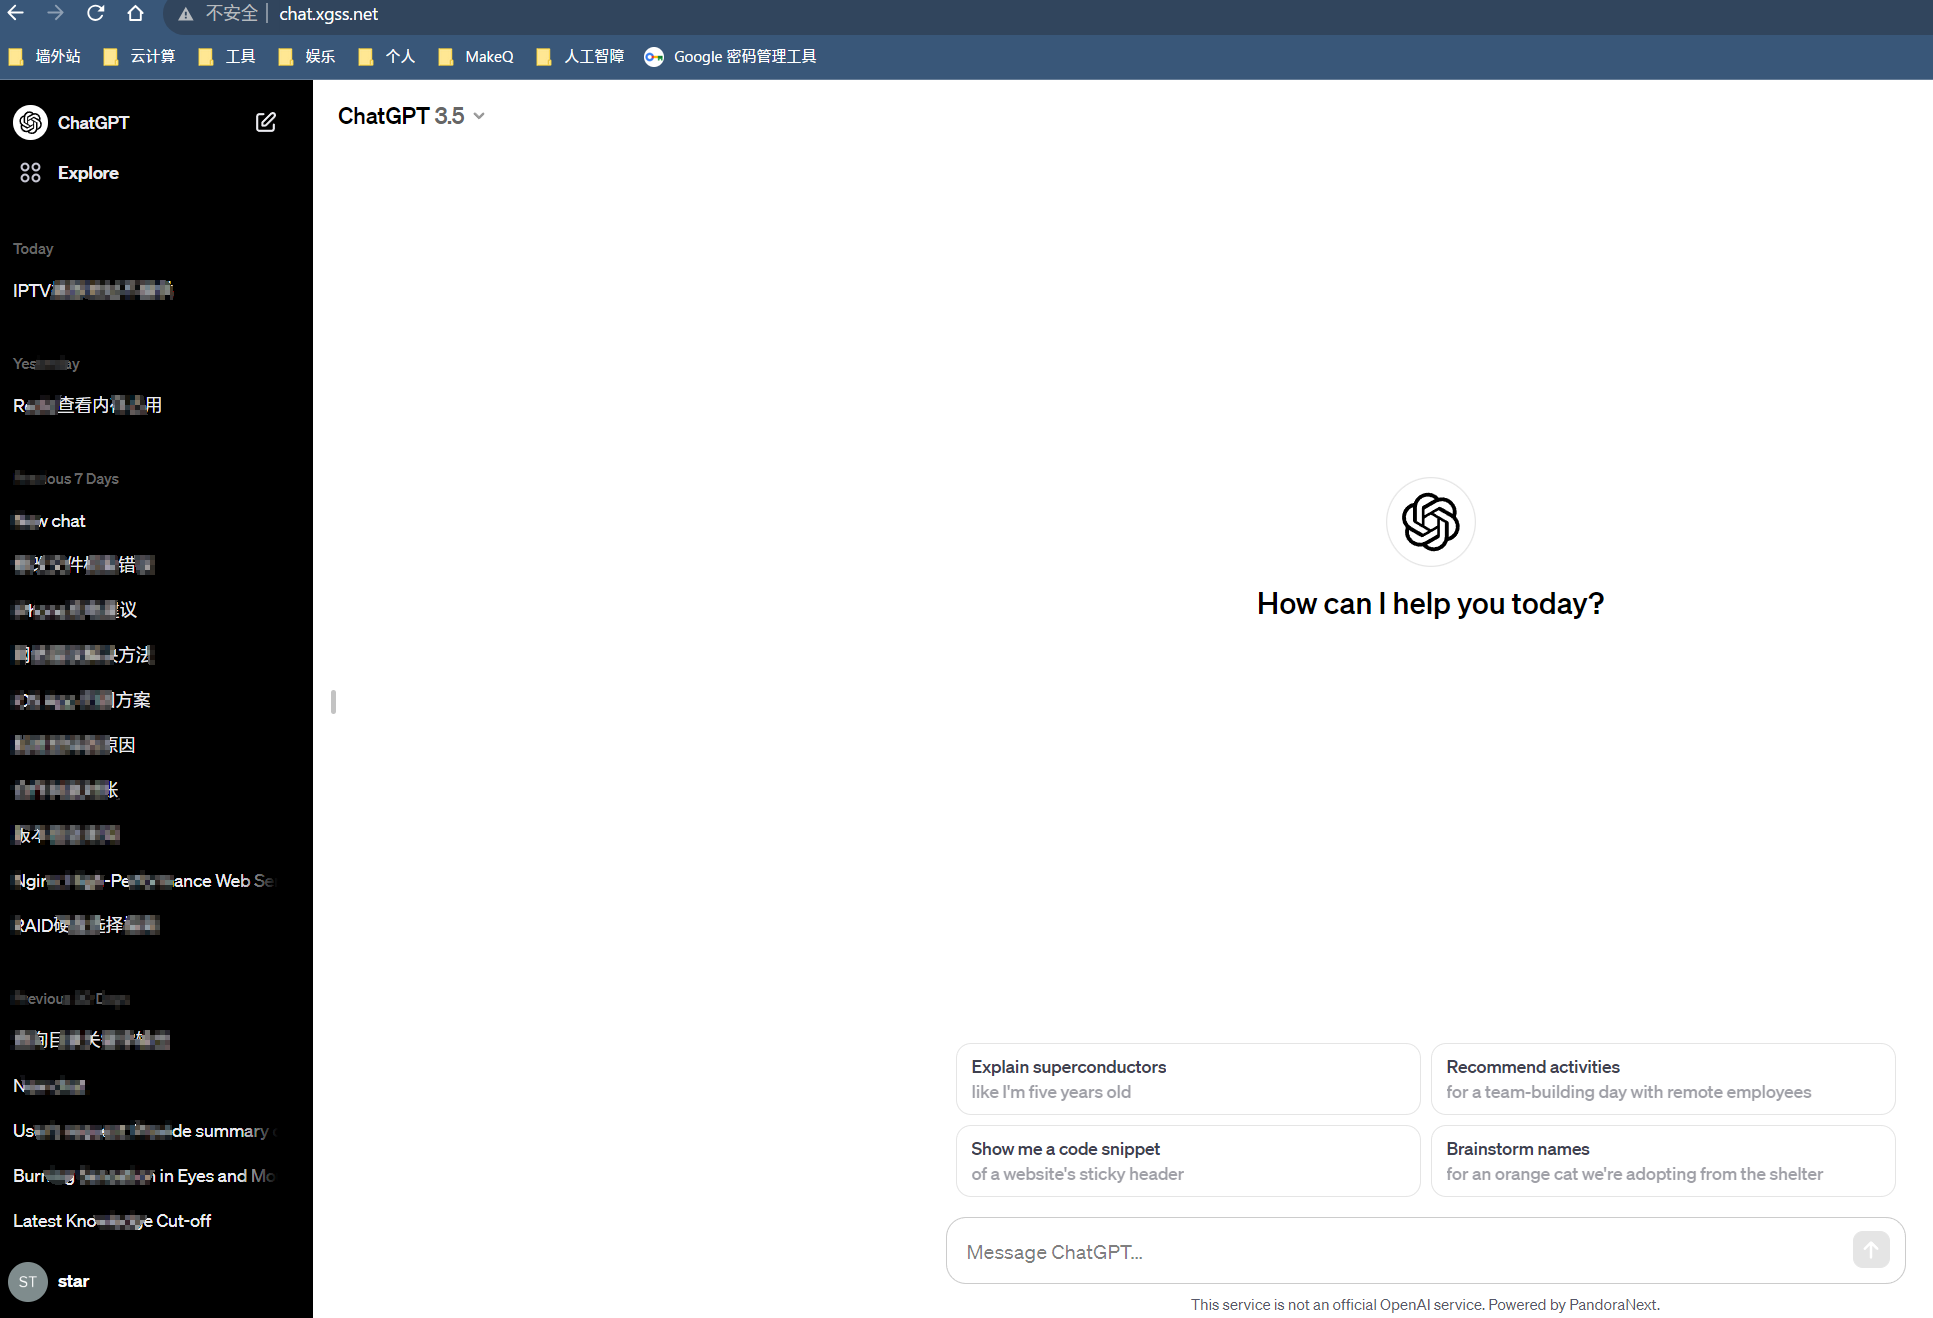
# 显示页面
